Step 3: Configure Custom Fields
Goal
Set up the extra information your school wants to collect for students, parents, and teachers, then decide who can see it, who can update it, and when it appears during onboarding.
Custom fields are one of the best ways to make BassemLabs feel like your school. They let you collect the details that matter to your process without forcing every organization into the same profile.
What custom fields are
Each user type already has built-in fields. Custom fields are the extra data you add on top.
For students, built-in fields already include:
- First name
- Last name
- Gender
- Date of birth
- Username
- Grade
- Student ID
So this step is not for recreating basic profile data. Use it for school-specific information such as health details, pickup permissions, previous-school history, consent, internal notes, documents, or onboarding requirements.
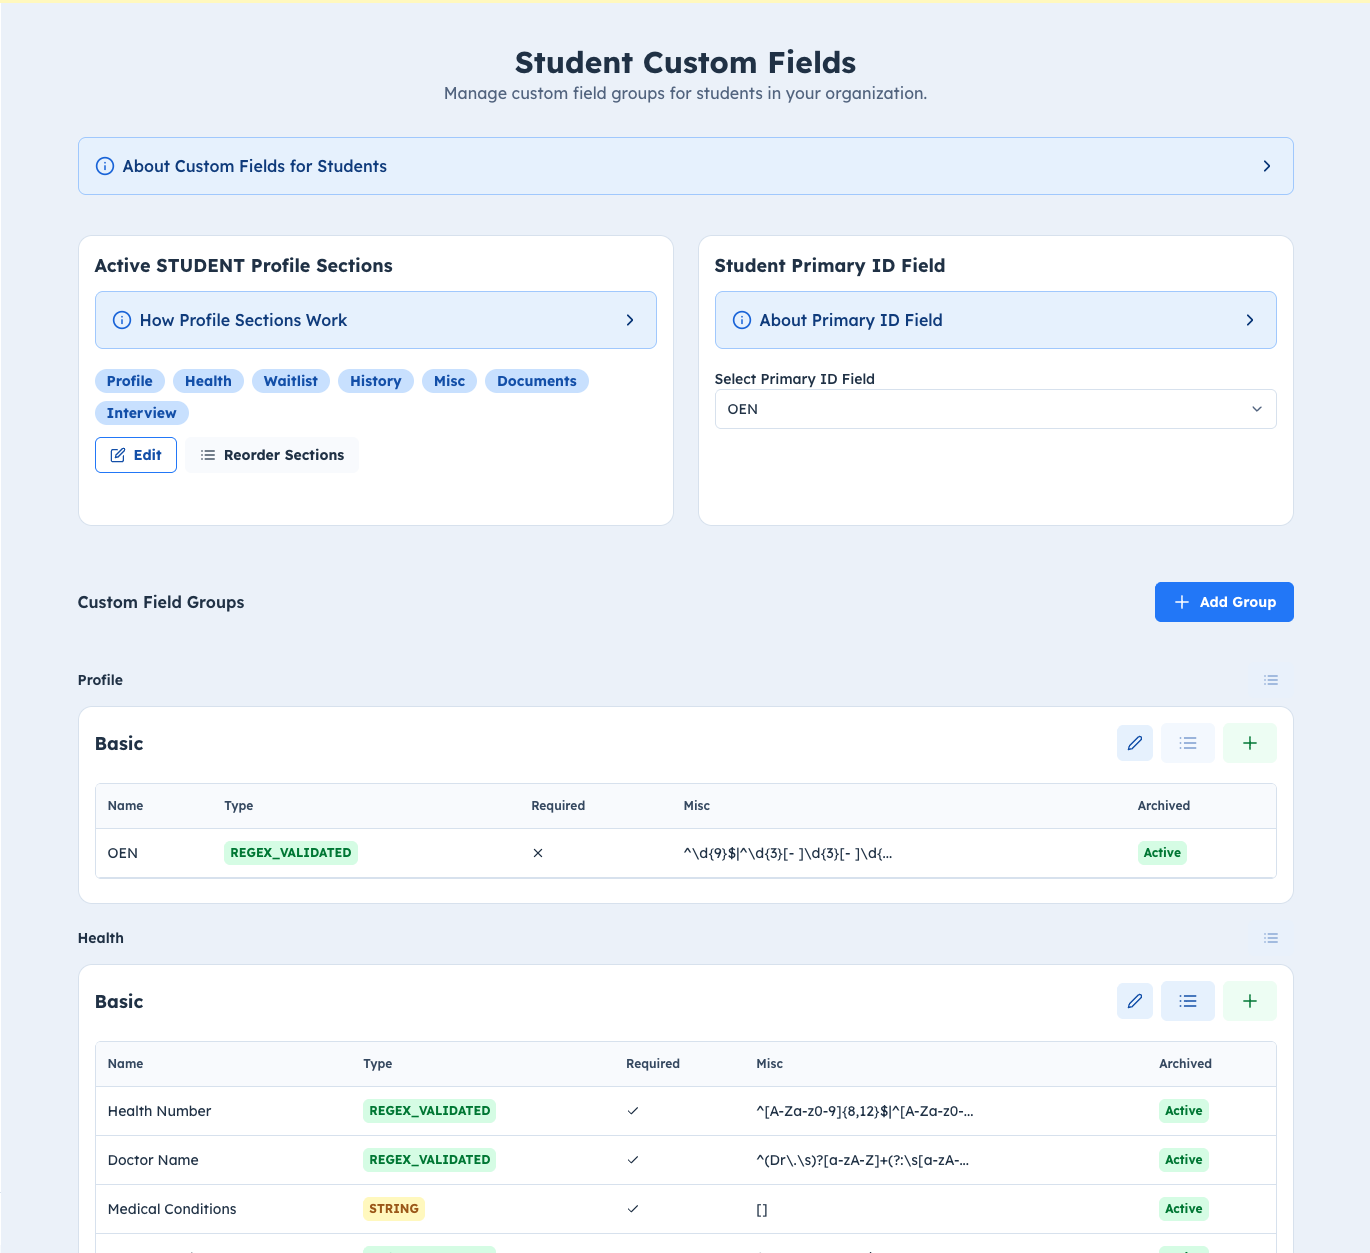
How the system is organized
Think of custom fields in four layers:
- Profile Sections: the profile areas your organization has enabled, such as Profile, Health, Documents, Waitlist, or Forms.
- Custom Field Groups: a named set of fields inside one profile section, for one user type.
- Custom Fields: the actual questions or values inside the group.
- Entries: the answers saved for one student, parent, or teacher.
Access rules sit on the group and apply to the group, its fields, and its entries.
How this part of onboarding is split
In organization onboarding, custom fields are split into a few focused screens:
- Access Rules
- Custom Field Templates
- Student Fields
- Parent Fields
- Teacher Fields
Set up access rules first, then templates or groups, then the fields themselves.
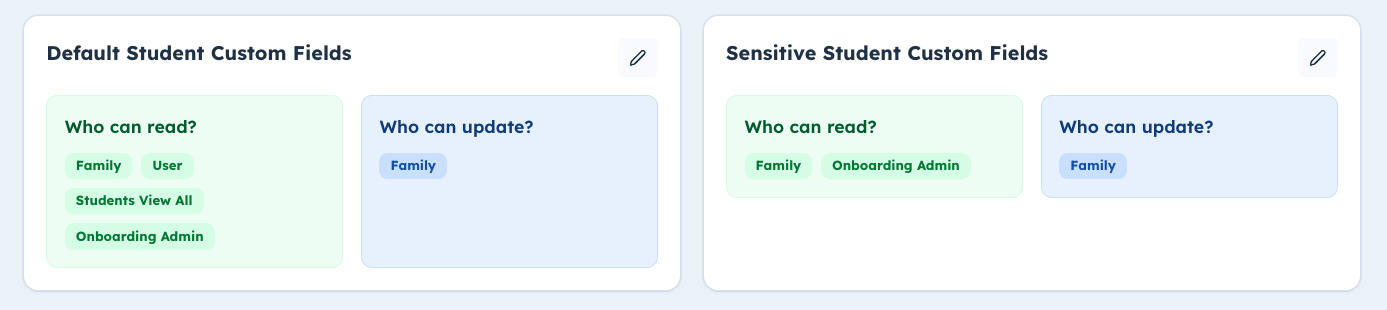
Access rules
Access rules define who can read or update a custom field group.
Rules can grant:
- Read access: who can see the group and its values.
- Write access: who can update values in the group.
Rules can target:
- User: the student, parent, or teacher connected to the record.
- Family: family members connected to the record.
- Staff permissions: staff members with a selected permission.
Important rules:
- A rule should target either a user/family relationship or a staff permission, not both.
- Teacher custom-field access cannot use Family.
- Managing access rules and custom-field structure requires Full Organization Settings Access.
Custom field templates
Templates are a fast starting point. A template can create multiple groups and fields at once.
When applying a template:
- Choose access rules for every group in the template.
- A template can only be used once by the organization.
- If a group with the same name, user type, and profile section already exists, the template will not apply.
- You can still edit the created groups and fields afterward.
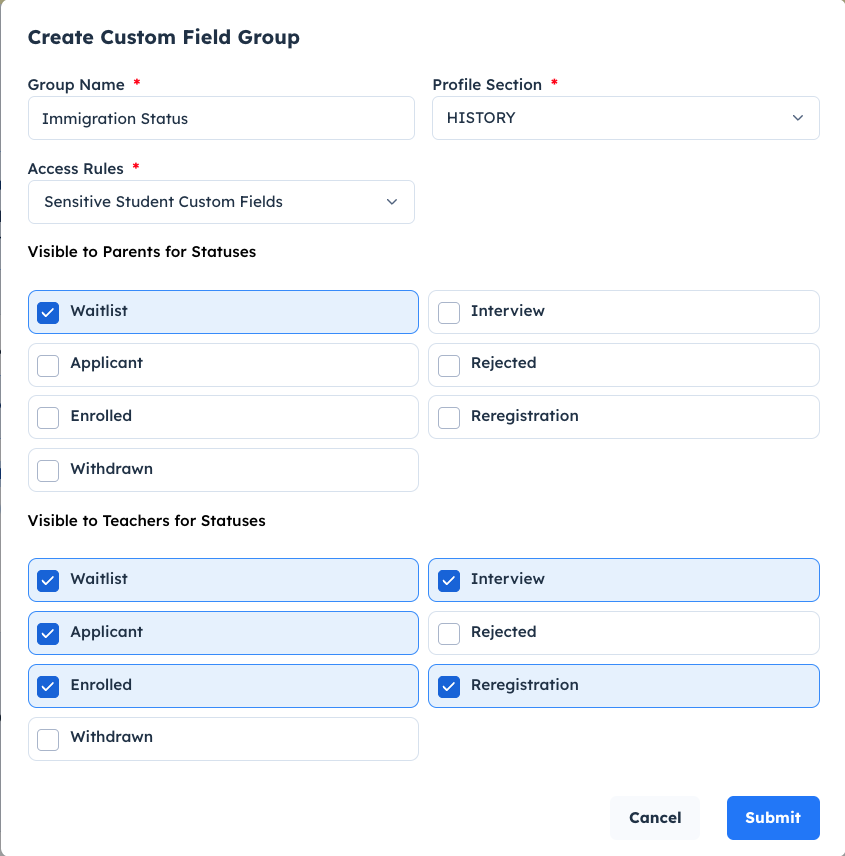
Creating groups
A group belongs to:
- one user type: Student, Parent, or Teacher
- one profile section
- one access rule set
For student groups, you also choose status visibility:
- Visible to Parents for Statuses
- Visible to Teachers for Statuses
These status lists control where the group appears during student onboarding and review.
When student groups appear in onboarding
A student custom field group appears for a student status only when all of these are true:
- The group is a Student group.
- The group's profile section is active for students.
- The group has at least one active field.
- The student's current status is included in the correct visibility list.
- The current viewer is allowed to read the group by its access rules.
The visibility list depends on who is viewing:
- Parents and students use Visible to Parents for Statuses.
- Teachers and organization owners use Visible to Teachers for Statuses.
For parent-facing required actions, there is one more condition:
- The group must allow Family write access.
This is what makes a group become something parents can actually fill, not just something they can see.
Profile section visibility
Profile sections are a master switch.
If a group is assigned to a profile section that is disabled for that user type:
- the group is visually marked as disabled in custom-field setup
- it is hidden from profile/onboarding display flows
- it is not used when collecting onboarding field groups
For students, Waitlist is a required profile section and cannot be removed.
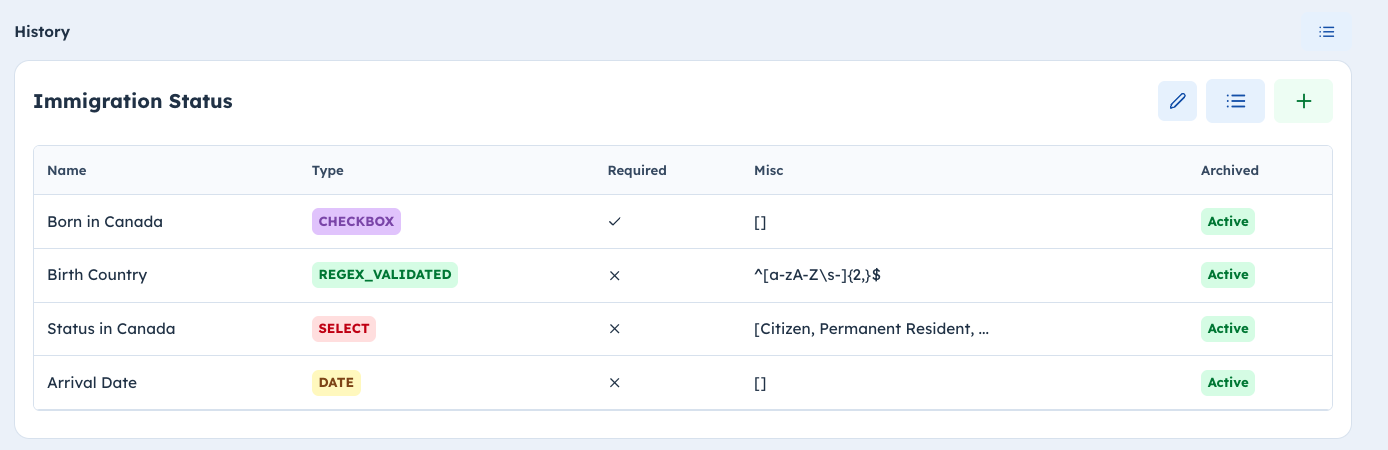
Creating fields
Fields live inside groups. Supported field types include:
- String
- Select
- Address
- Date
- Regex Validated
- Checkbox
- Document
- Phone Number
Useful setup notes:
- Choose the field type carefully. Existing field type is not edited later.
- Select fields need options.
- Regex fields need a valid regex pattern.
- Required fields affect onboarding completion and review status.
- Archived fields are kept for history but hidden from active forms.
- Groups and fields can be reordered so the profile reads naturally.
Approval and review
When parents or students fill a group, BassemLabs tracks the group's review status.
Statuses include:
- Required to Fill
- Pending Review
- Approved
- Rejected
Organization super admins and onboarding admins can approve or reject groups. Once a group is approved, non-super-admin users cannot edit it unless it is reset or rejected.
Student Primary ID Field
For student fields, choose a Student Primary ID Field if your school uses a custom identifier in reports, PDFs, or transcripts.
Pick a field that is stable and unique, such as registration number, ministry ID, or another official student identifier.
Why this step matters before uploads
- Student and parent custom fields become columns in student bulk upload templates.
- Waitlist uploads use waitlist student fields.
- Enrolled uploads use active student fields.
- Parent custom fields appear under Guardian 1 and Guardian 2.
- If you change fields later, download a fresh upload template.
Keep it simple
Good custom fields are focused. A useful group should answer a real operational question:
- Do we need this to enroll, support, bill, teach, or protect the student?
- Who should fill it?
- Who should review it?
- Does it belong on the student, parent, or teacher profile?
If the answer is unclear, keep the field out of onboarding and add it later.
Detailed documentation
Use this onboarding page for setup. For group management, field types, access strategy, visibility examples, review behavior, upload-template effects, and best practices, use: